Thanks to our community members, we’ve made some improvements to Hubs! If you are running your own Hubs instance, we encourage you to consider upgrading to this newer and better version.
What’s newer?
Improved storage
We’ve significantly improved the data storage. Previously, the Hubs software stored all of its data (avatars, scenes, logos, etc.) on the same node. If that node became corrupted or was impacted during hosting maintenance, all of your data could be deleted and not be recovered. This upgrade to the Hubs software should decrease the risk of lost data and hence reduce downtime.
This upgrade no longer relies on hosting provider backups (which no longer work); it utilizes a (generally) cheaper backup option. In our testing, recovering from backups with this new method is more reliable than backups or snapshots of data offered by hosting services. Why is it cheaper? Because you are not paying to store your backup at a hosting provider, you are storing your backup on your own computer.
Note: this data storage method will cost you ~$2USD a month in addition to what you already pay for your cluster. The previous backups in our testing cost ~$4 a month. So you are likely saving a couple dollars a month and gaining more reliability!
Documentation of the new features on hubs-docs and the release announcement with migration instructions by hobbs and Exairnous
Testing of the backup and restore scripts by @bitbengames (Discord), hobbs, and jua360
Testing of the migration instructions by hobbs and jua360
Migration instructions
These instructions are for Hubs instance owners who are both upgrading their version of Hubs Community Edition (CE) and necessarily downloading a backup of their Hubs instance data for the upgrade. If you are starting with a brand new Hubs instance, the instructions you need are already incorporated into the Beginner’s Guide and How to back your Hubs instance.
Important notes before you begin
Our instructions will show DigitalOcean and Porkbun, the same data hosting and web domain providers from the Beginner’s Guide. If you are using different providers for your online storage and A records, follow along with our logic. The Hubs Community Edition software IS agnostic so you are not restricted to DigitalOcean and Porkbun. But, your mileage may vary (YMMV).
We must encourage you to follow these instructions closely. Doing a step out of order could leave you with a non-working instance and without access to your data. If this does happen, we have In case of disaster instructions. We’ve got your back and you are welcome to do this upgrade together with community members during one of our many weekly meetups.
In our testing, this process took 30 minutes to an hour. If you have a lot of data on your instance, or a slow Internet connection, it could take hours. Set aside the time. How long it takes depends on how much data you have and your internet speed. Again, YMMV.
WARNING: do not continue on to the “After updating your Hubs CE deployment scripts” section in the What’s Next document, follow the steps below instead.
2. Download a backup of your data to your computer as instructed here in the “How to do a backup” section of the backup instructions.
3. Save a copy of your current hcce.yaml file because you will be changing it. You can copy the file and paste it into the same folder, if you like.
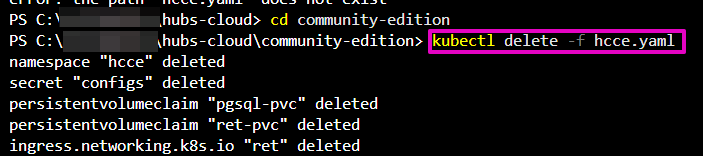
4. Delete your Hubs instance. It is very important to delete BEFORE we get the new version. Copy and paste this into the terminal and hit enter:
kubectl delete -f hcce.yaml
If you get this “Error from server (NotFound): error when deleting “hcce.yaml”: secrets “configs” not found”, it’s OK. Carry on.
5. Regenerate the hcce.yaml file. Copy and paste this into the terminal and hit enter:
npm run gen-hcce
6. Then apply the new configuration (hcce.yaml). Copy and paste this into the terminal and hit enter:
npm run apply
IMPORTANT: If this command runs for more than five minutes, you are in trouble. You should cancel out of the transaction. End the transaction by typing Control + C and selecting Y for yes to cancel out. And then go to the In case of disaster section below.
If you see a notice that the load balancer does not have an IP address, don’t worry. Run the following command repeatedly until your load balancer does have an IP address:
npm run get-ip
7. Restore your instance from the backup; this returns all of your data back. Follow our “How to restore a backup” section of the backup instructions.
NOTE: depending on your Hubs file size and internet speed, this could take a while. In our testing, it averaged 30 minutes.
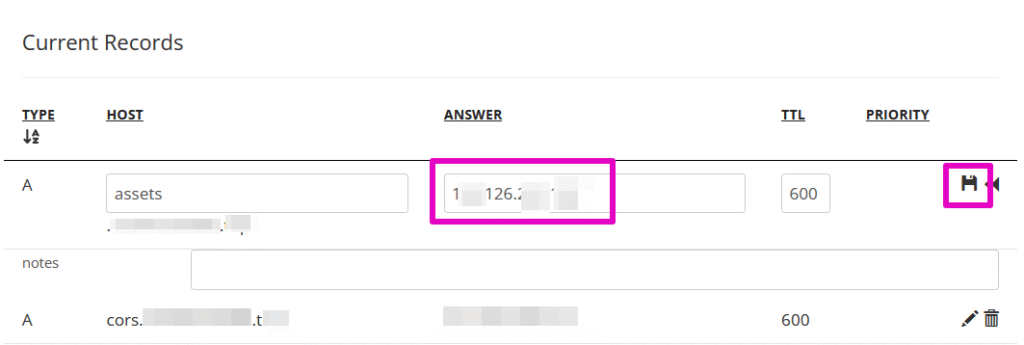
8. Similar to the Beginner’s Guide, Step 14j, you will edit the IP address section of your DNS records (your four A Records). You will replace your IP address with the new IP appearing in the terminal window.
For example: the Terminal window indicates: load balancer “lb” in namespace “hcce” external address: 123.126.200.10
Thus, the IP address is 123.126.200.10
Continuing this example at Porkbun: Select the pencil icon. Highlight the Answer field entry and replace it with your new IP address. (copy and paste is OK) Select the save disk icon. When finished editing the 4 A Records, you may log out of Porkbun.
Wait 10 minutes or so for your DNS changes to be applied.
IMPORTANT: Remember to comment out the default SSL code line!
If npm run gen-ssl does not work, enter Control+C to exit, then “Y” and hit enter for yes to terminate the run. Then rerun npm run gen-ssl
You will know it is working when your instance is up and at DigitalOcean, for Volumes Block Storage, there are 2 volumes attached to your Droplet. See the Persistent Storage for Hubs on DigitalOcean in the What’s Next document.
Try your Hubs instance now! It should be upgraded and working.
Celebrate your new awesomeness and rest easier knowing that your Hubs data is now backed up in a better and cheaper method. Hooray!
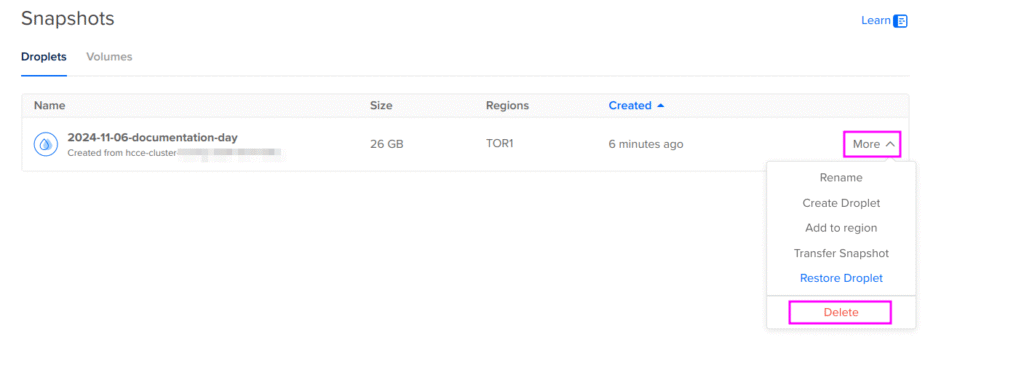
Snapshots & Backups on DigitalOcean
If you took DigitalOcean “backups” or “snapshots” to back up your instance before, they cannot be used to restore, after migration. You should delete them to save money. See the How to Backup Your Hubs Instance document for how to do backups now.
In case of disaster
If anything goes wrong, don’t worry, all is not lost. Your data is still present on the node. You can revert to your old setup and try again.
How to revert to your old setup
To delete the problem setup, copy and paste this into the terminal and hit enter:
kubectl delete -f hcce.yaml
Replace hcce.yaml with the copy you saved in Step 3 of the Upgrade Instructions:
In the File tree (Explorer), in community-edition, delete the hcce.yaml file.
Copy the hcce – Copy.yaml. Then rename one of the copies back to hcce.yaml.
WARNING: In your restored hcce.yaml file, the default ssl certificate line must be uncommented (the number sign (#) removed) to generate new SSL certificates. You will uncomment that line next.
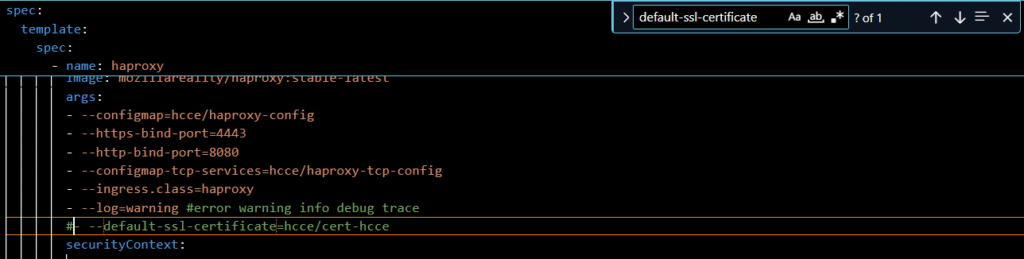
Uncomment the default ssl certificate line in your hcce.yaml file:
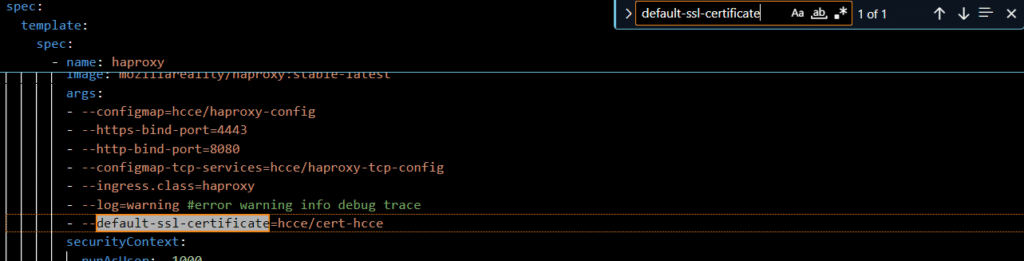
Select Control + F on your keyboard and search for this text: default-ssl-certificate.
Remove the number sign (#) from the beginning of that line. The resulting line should contain, as shown below: – –default-ssl-certificate=hcce/cert-hcce
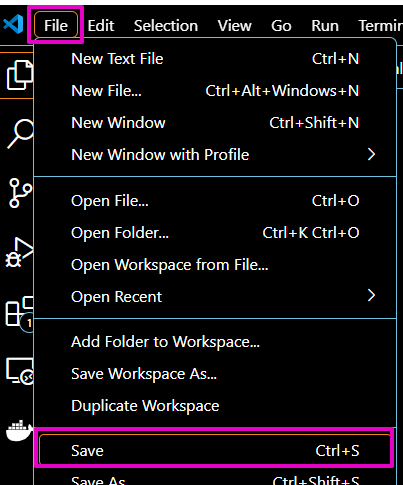
Select File, Save. This will keep all of the changes you just made.
4. Complete Step 13, Step14 (you will edit your A Records, not create new A Records), and Step 15 from the Beginner’s Guide
You should be back to where you started. Come over to Discord and ask for help.